Repowering Anju - Part 1
13th September - 24th October 2007
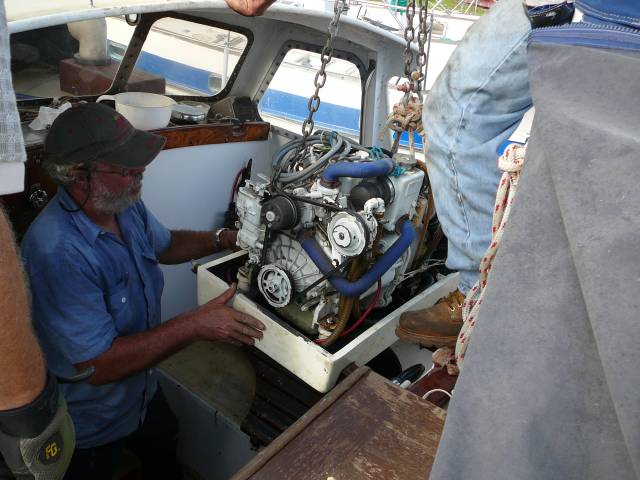
So, the local Yanmar mechanic was summoned for a quotation for removal of the old engine and purchase and installation of the new 4JH4AE, 4 cylinder diesel. The good news was the cost of the engine, the bad news the amount of work (at $75 per hour!) that would be involved in installing the new engine. Our options were to dismantle "old Yanny" into pieces small enough to remove from the boat and then break down "new Yanny" the same way, to get it into the engine room. The cost would be considerable, not to mention the unpopular idea of dismantling a brand new engine prior to installation.
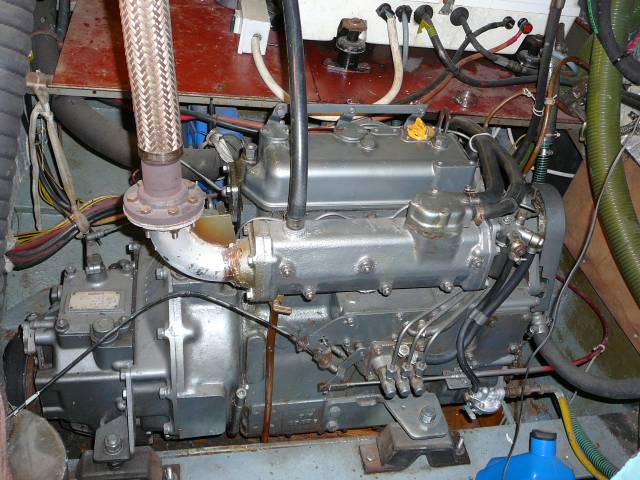
Our beloved Yanny Senior.
Our first step was to remove the hydraulic steering system from the cockpit, to clear the area ready. Soon, Phil was on his knees in the cockpit, circular saw in hand, nervously beginning to cut out the soft patch. It wasn't a nice feeling taking a circular saw to your boat. However, on the plus side, working in the engine room became much easier on the back muscles when the new sunroof was created and you were able to stand up straight in there!
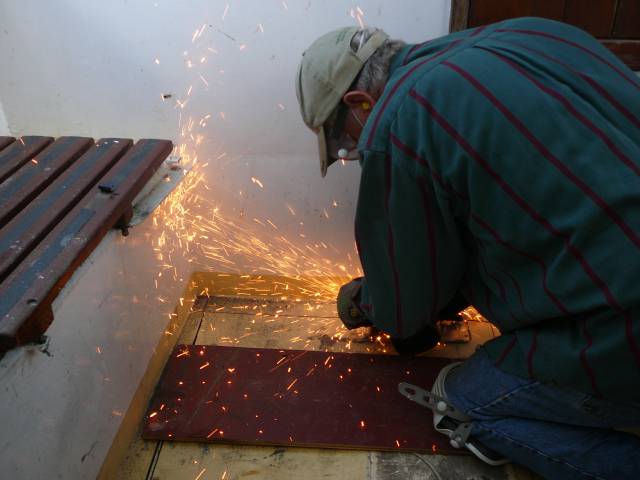
Cutting a hole in the boat!
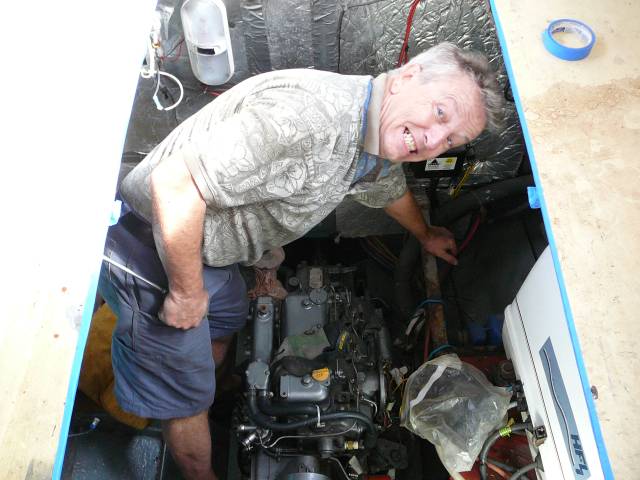
Phil enjoys the sunroof.
Yanny sees daylight for the first time in over 20 years!
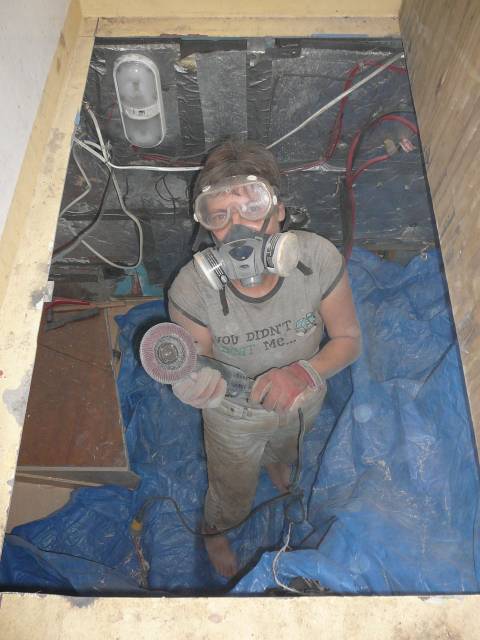
Who is that masked woman?
The new engine was due early Tuesday morning and we waited aboard excitedly for its arrival. By lunchtime there was no sign of truck or engine, so we made enquiries. Apparently the truck driver had been unable to find the marina and had gone on to his next drop off, way south of us in Palatka. We were told that he'd try to drop off the engine on his way back that afternoon. By now we were nervous as the crane was already booked for the next day. So, we sat and waited expectantly all afternoon.
By six pm, with no sign of the truck, we had to make a trip to the grocery store to buy something for dinner. Needless to say, as soon as we'd left the yard, the truck appeared and dropped off our special delivery, so we missed the whole thing!
Next morning, on opening the crate, it looked as though the driver may literally have dropped-off our engine, as the crate was damaged and one engine mount bent. Fortunately the engine itself seemed undamaged and a new mount was quickly despatched from Yanmar.
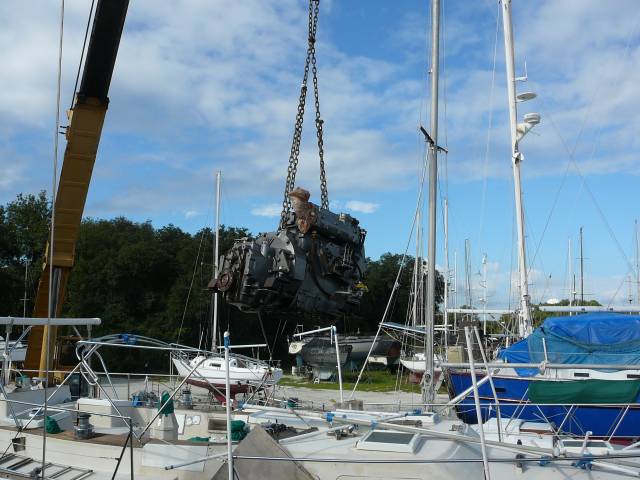
Out with the old.......
By the time the crane team arrived, old Yanny was fitted with chains and ready to lift, Genny, the generator was also waiting in the cockpit to be removed from the boat. We'd decided that we really didn't need a 6 KW generator. All we normally ran with the generator was the battery charger and carrying the weight of the big generator around the world with us, just didn't seem justified. Whilst the crane was available, Genny was to be lifted out, for sale and replacement with a small portable 2KW Honda generator.
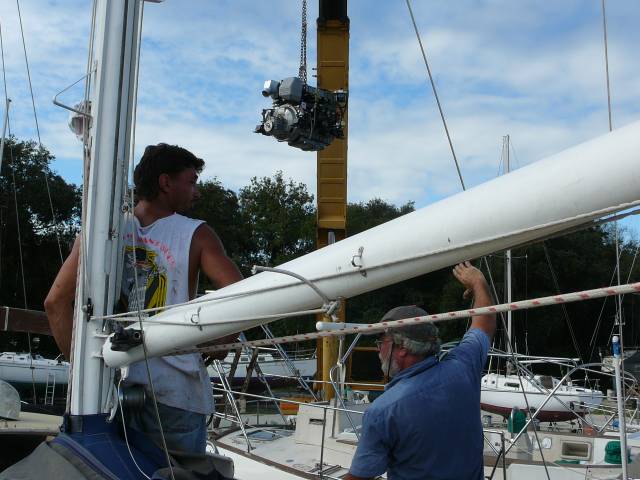
In with the new.
Harry supervises the generator lift.
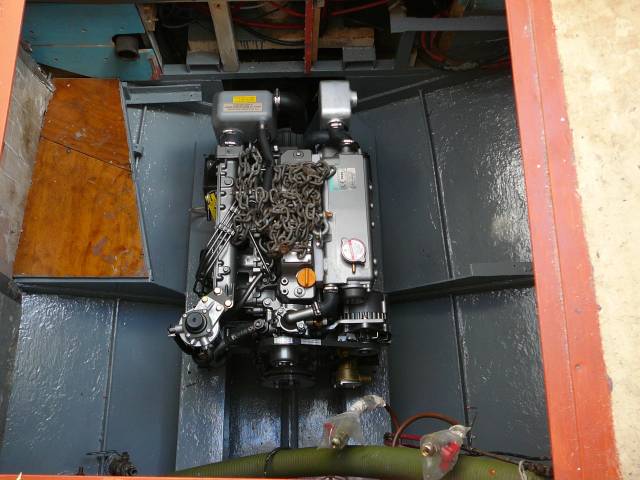
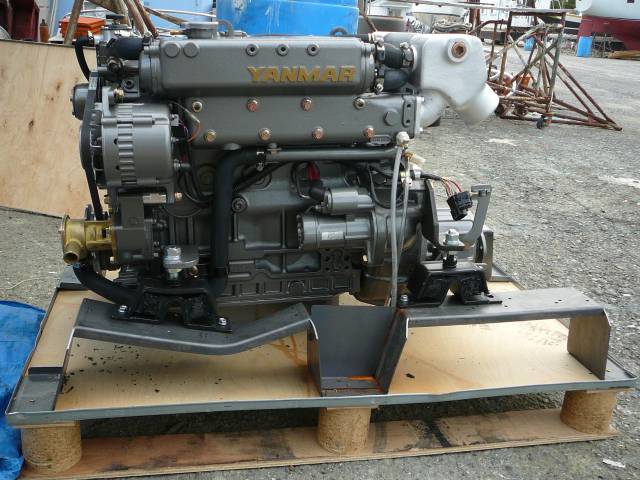
New Yanny ready for installation.
Meanwhile we had to remove the old coupling from the prop shaft, which proved impossible with the tools we had available. It was firmly stuck, possibly rusted, in place. Harry came to our aid, manufacturing a coupling puller to fit and, with the aid of the puller, the coupling finally came free from the shaft with an incredible bang.
Now we needed to remove the stuffing box and propeller, in order to pull out the shaft. The propeller proved just as stubborn to remove as the coupling. Prior to ordering the new shaft we decided that, now we had the freedom to determine the desired length of the new shaft, we'd like to move the engine forward a few inches, to create more working room around the gearbox at the back.
Eventually everything was on its way to Jacksonville Prop for machining of the new shaft. Of course, on arrival we were informed that our prop also had a non-standard taper bore. Now we faced another dilemma, if we machined the shaft to fit our existing prop and later discovered on sea trials that we were under-propped with the new engine, we'd have to find a new prop with the same non-standard taper. With our custom built, one-off steel boat, even the experts didn't seem able to give a definitive prop size for the new engine, so some experimentation would surely be required. Our new prop shaft was finally delivered with standard propeller taper and the existing prop bored out and fitted with a sleeve, to make it fit. Now we could finally begin to position and align the new engine.
Our Yanmar mechanic called to check and assured us we'd still have room in front of the engine for the required 3" exhaust muffler for the exhaust system he had in mind. Whilst he was there, we picked his brain about how he would begin the engine alignment. Our concern was that with a shaft 8 feet long supported only at the end where the cutlass bearing was located, it would be impossible to ensure that the inch and a quarter shaft was accurately centred in the 3 inch diameter stern tube before beginning alignment. What was our mechanic's advice. No problem, we were assured, he would just look down the tube and decide by eye when it was in the centre. "Uhm, huh?" we thought to ourselves, this didn't seem a very accurate way to begin to align an engine to within a thou of an inch. This would need a little more thought than the mechanic seemed to believe would be justified.
Phil lay awake and pondered the issue overnight. Finally he had an idea to manufacture a temporary support bearing to fit the stern tube out of plywood, to assist during initial alignment. On further consultation with our experienced machinist neighbour, John, together they came up with a design for a support machined from a PVC pipe cap on which, with his specialist lathe equipment, John could machine the inch and a quarter hole for the shaft precisely in the centre. Next day John returned to the yard with his fabulous invention, now we were getting somewhere.
On installation of the shaft, we drew the new coupling up towards the gearbox and discovered, as we'd suspected, that the engine would need to be raised up by about one inch. Four 1" hardwood shims were cut and on placement below the engine mountings, they positioned the engine at more-or-less the correct height to meet the coupling. With the aid of John, our invaluable neighbour, who had lately also become a fibreglass expert, we decided to epoxy the shims in position prior to drilling the holes through the wood and steel for the engine mounts. First we'd need to carry out engine alignment to ensure we would epoxy the wood in the correct position.
Our experience of engine alignment was somewhere between limited and non-existent. However, with an awful lot of patience, some advice from Harry and John and our trusty feeler-gauges in hand, after about two hours we were almost there. At this point our mechanic called by to check on us and somehow managed to knock the engine back out of alignment. We were not impressed as we began the alignment process again. Finally, once again, we had the correct position and marked the location where we would epoxy the wooden shims.
Now, of course we had to undo all the good work and lift the engine out of the way to apply the epoxy and place the wood back down in the correct position, to cure overnight.
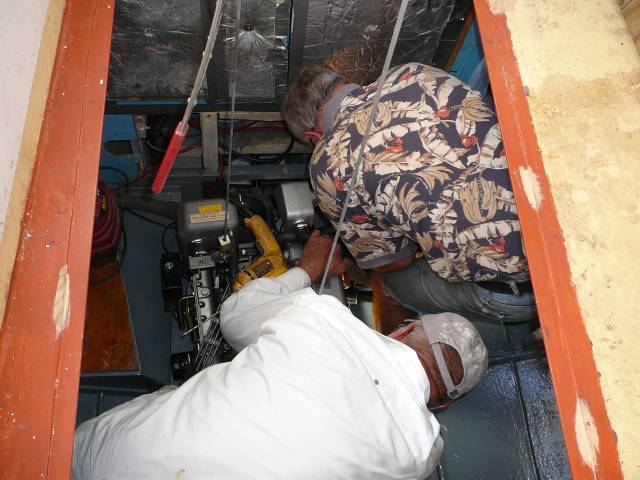
John helps us drill the holes
A day later and we were ready to position the engine and bolt it down for final alignment. Now we were becoming experts as we'd already aligned the engine three times before! The engine was bolted in position but before connecting the prop shaft, we decided to replace our old stuffing box with the new drip-less type of shaft seal, to eliminate salt water and the resulting potential for rust in the bilges.
Holey Seal Batman! Our not so dripless seal!
Now our exhaust system required attention. It would be a completely new installation as the old exhaust had a 2" diameter whereas the new 54 hp engine needed a 3" diameter exhaust system. The starting point would be the new exhaust muffler, which was of considerable size to accommodate the volume of water from the 3" diameter exhaust pipes. We decided to get the muffler first, then work on the rest of the design. The mechanic had advised us to locate it down in front of the engine and checked to make sure there was plenty of room. Needless to say, it was delivered and wouldn't fit. Aargh.
The mechanic was called in again to view the problem. In addition we had concerns about the exhaust design he had in mind, as the water would need to lift almost ten feet from the bottom of the muffler to the exhaust outlet and we were worried about the resulting back-pressure. Everything we'd read advised a maximum lift of four feet, so this too was discussed. Following discussions we agreed to differ with our mechanic and re-design the exhaust system ourselves.
During this visit the mechanic also looked over the engine installation and asked where the fuel return lines would run. This was a new and interesting concept to Team Anju. Somehow the previous engine had run for twenty-odd years with no fuel return lines to return unburned, excess diesel fuel back to the tanks. When this was pointed out, it was a bit of a mystery to us how it had worked so well and we were left with yet another job on the ever increasing job list!
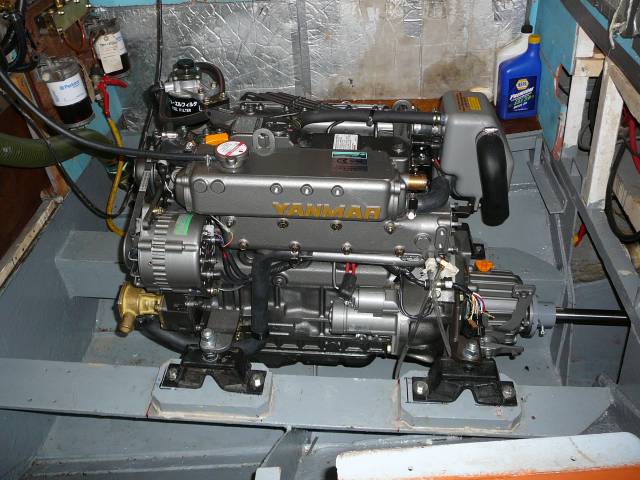
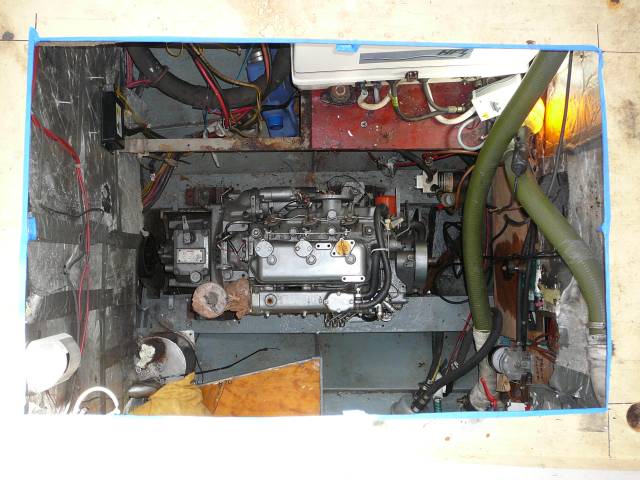
New Yanny secured in place and aligned.
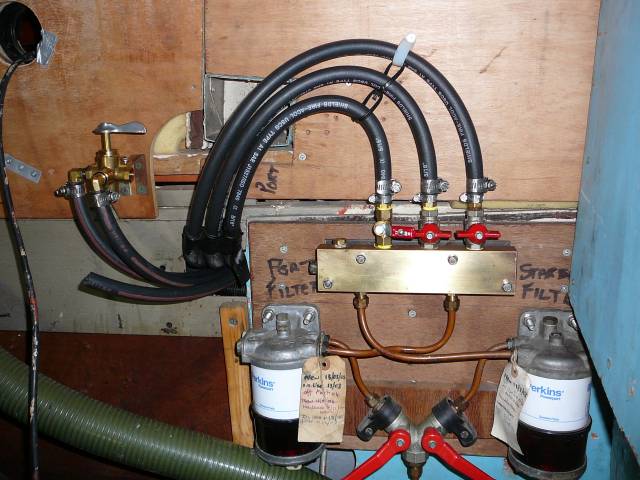
Hmm, fuel return lines - interesting concept.